Fix Xpenology problems viewing internal hard drives as esata hard drives
Synology NAS are nice, well manufactured, and have one of the best NAS operating system (Diskstation Manager or “DSM”). They are also, like almost every prebuilt NAS, very weak in terms of performance.
The solution is to install DSM on your own server/computer with Xpenology. It’s like what Hackintosh is to OS X when you create a Mac on a PC, but for the Synology NAS OS Diskstation Manager.
I had one problem after installing DSM with Xpenology: my server has 10 internal HDD, but I could see only 6 of them in DSM. After searching everywhere, I found that DSM see these 4 drives as eSATA drives instead of SATA.
Here is how i fixed that.
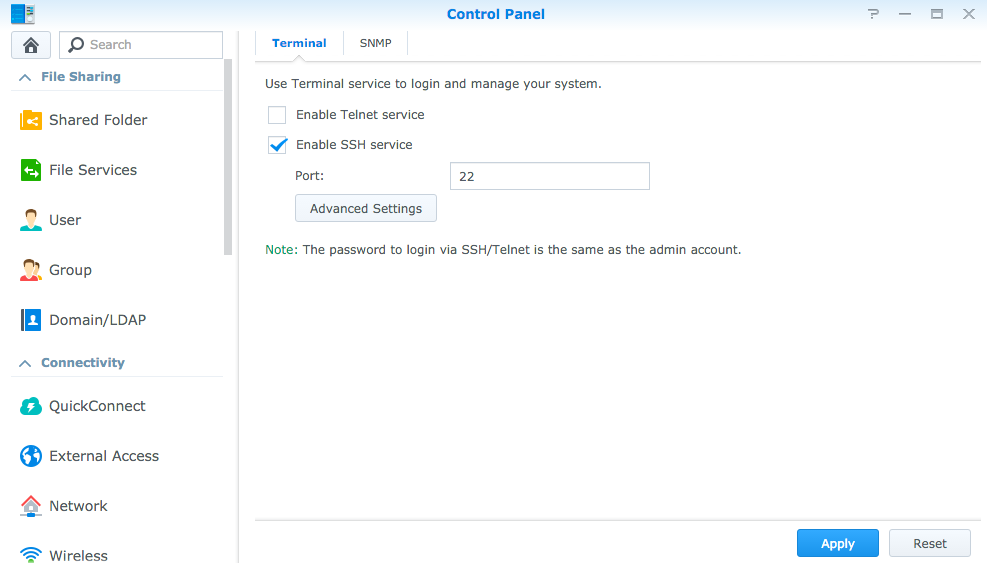
Enable ssh connection to the NAS
On the NAS, go to Control Panel > Terminal & SNMP, check Enable SSH service and click Apply.
Find what the system detects at boot time
Ssh to your nas with the root user, and get the booting messages. In my case, I have a volume called “volume1” and a folder called “media”, so i’ll put the created file in it and download it in DSM. My NAS has the local IP address 192.168.1.17.

How many hard drives?
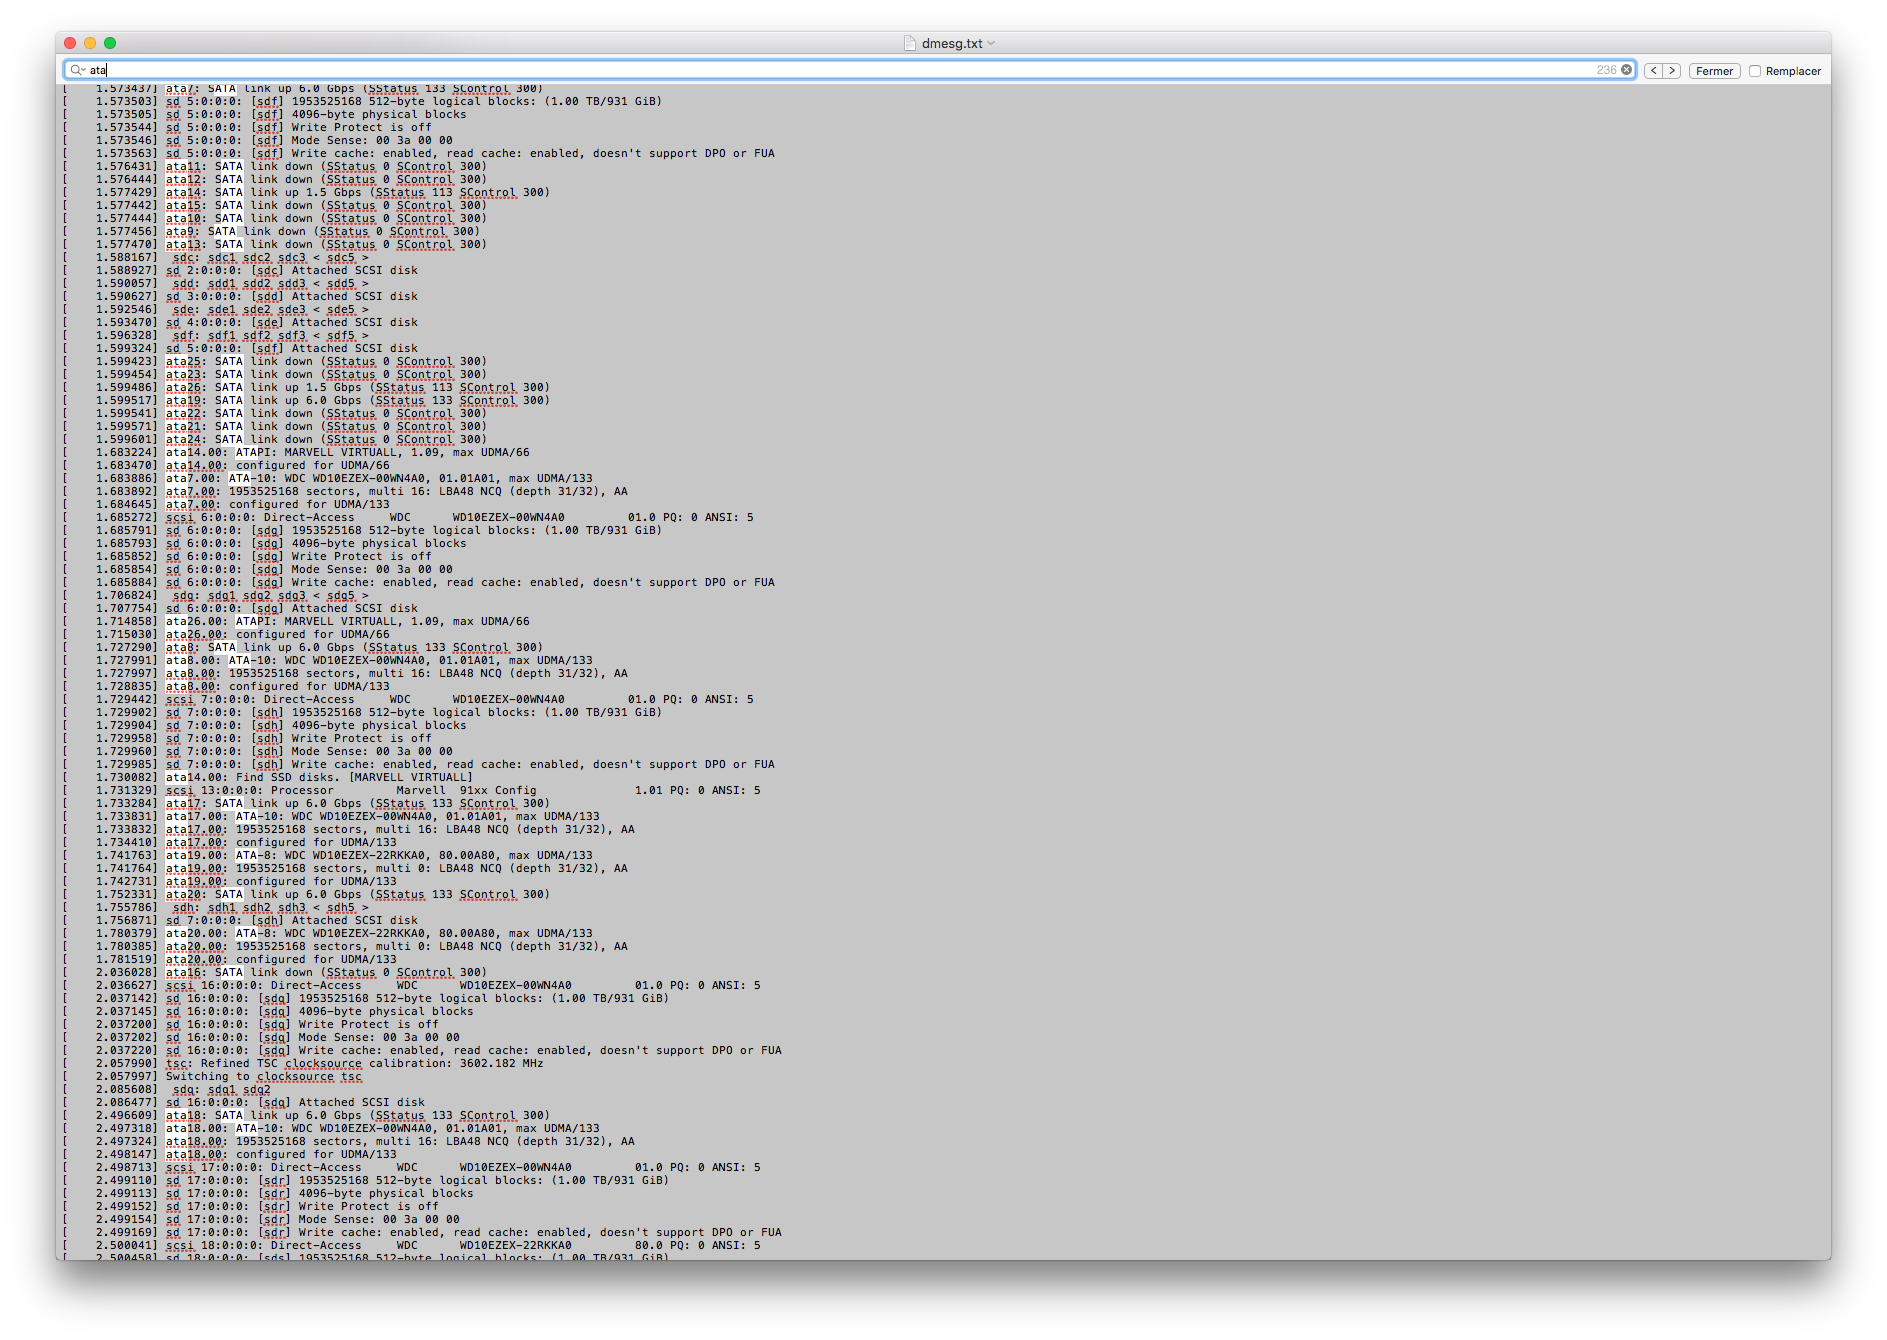
In this file, you’ll have to find the number of SATA drives that the OS detects by searching for “ata”. See in the capture below that the “ata” with the highest value is ata26 (click the image to enlarge it). That means the system detects 26 HDD.
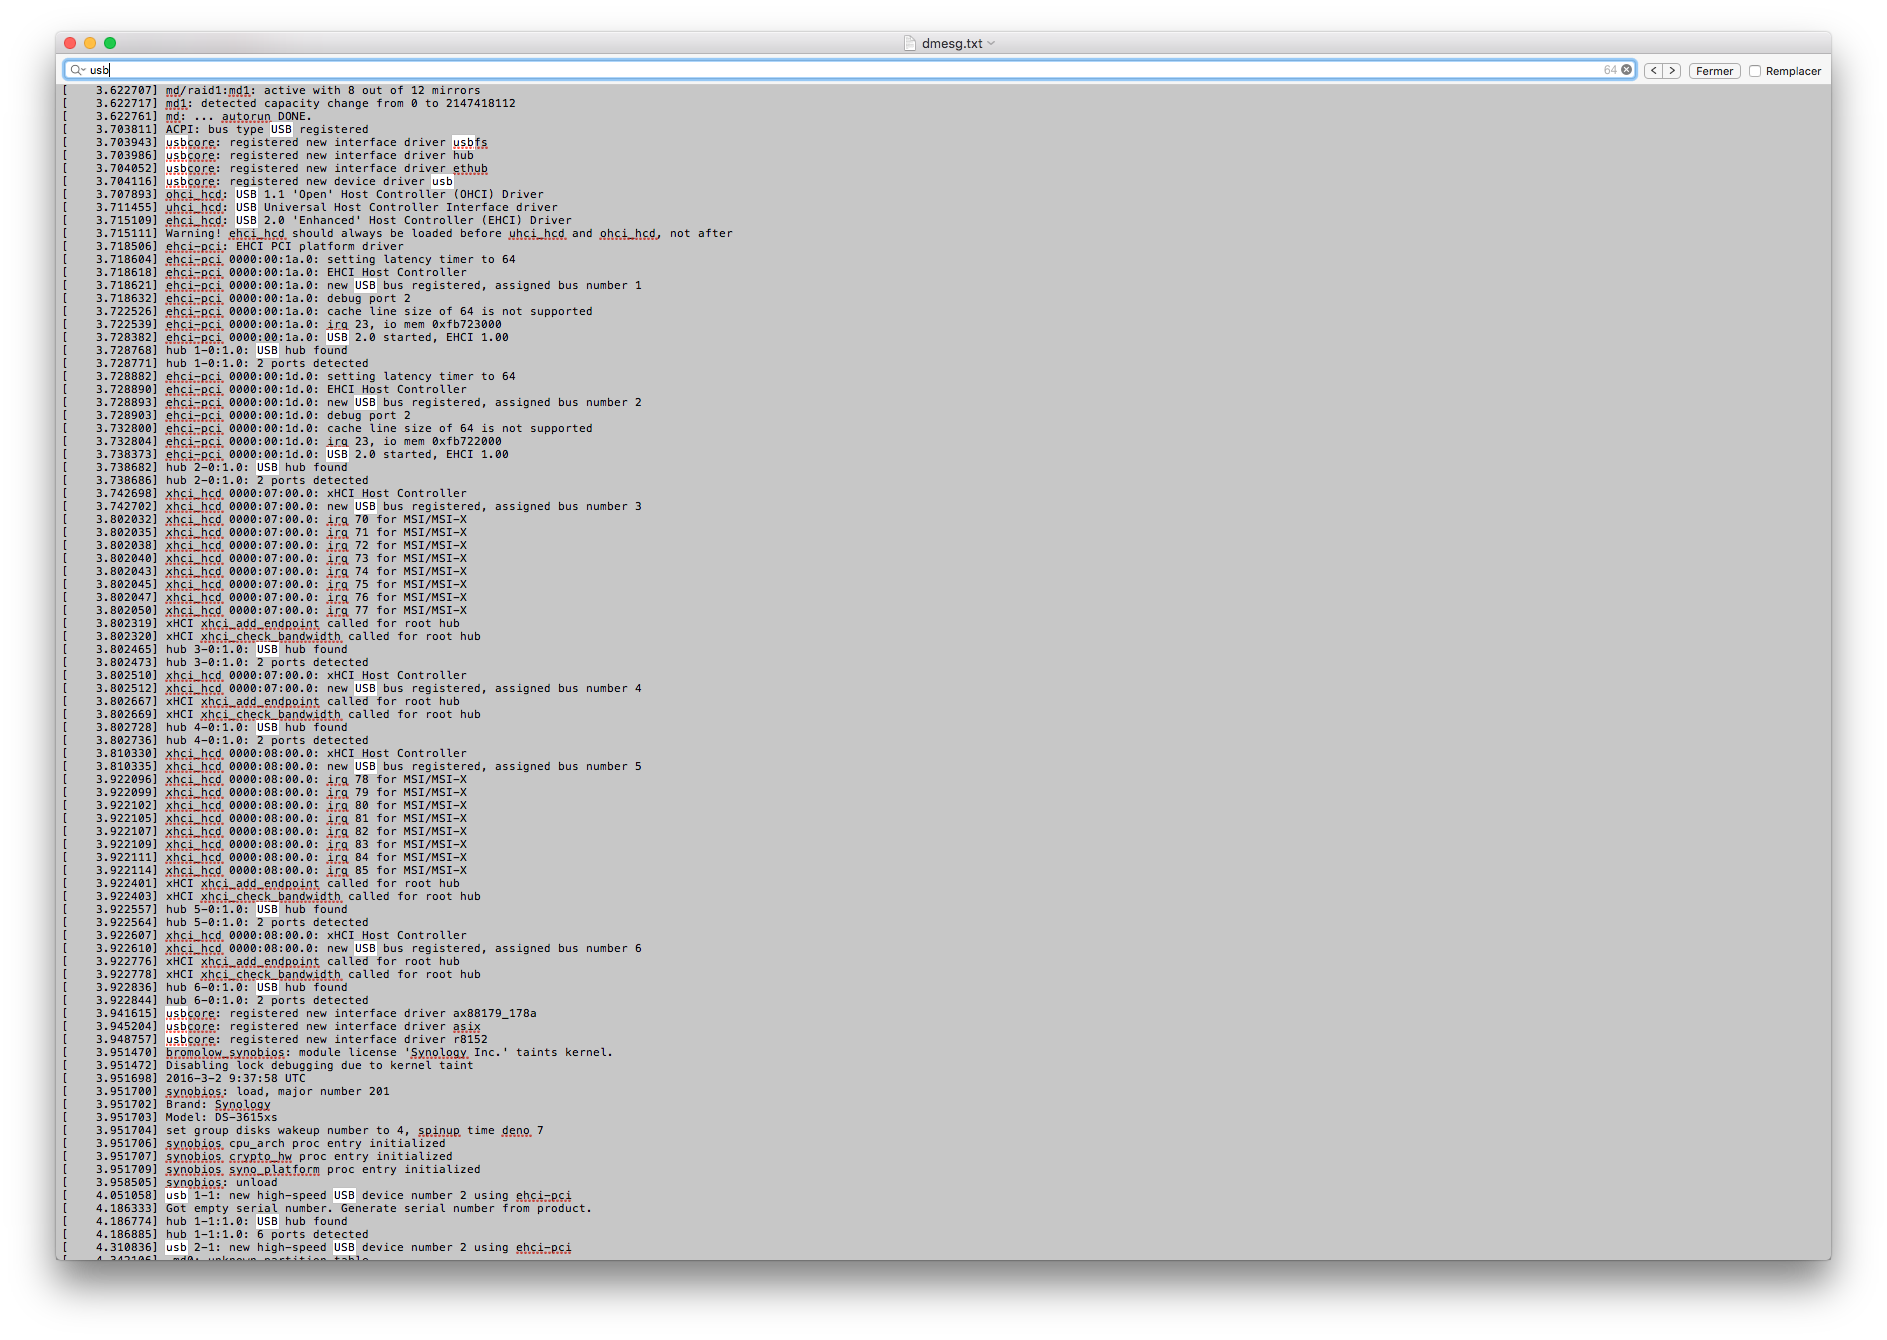
How many usb?
Now search for usb ports detected by the OS. Search for “usb”. You can see the sentence “new usb BUS registered, assigned to bus number X”. Find the highest bus number. In my case this is 6, so the system detects 6 usb ports.
Do some strange stuff with binary and hexadecimal values
Create a text file and paste this in it:
Starting form the right, change 0 to 1 for each sata drive recognized by your system. For me it is 26. I replace 26 “0” by 26 “1” starting from the right.
Do the same thing for usb ports, but do not overlap the “1” you have just placed before. For me, 6 usb ports.
Go to an online binary to hexadecimal converter like this one, and convert your bin values to hex values. My values gave me that:
Update the synology conf files
Ssh to your NAS, make a backup of the existing conf files in case something goes wrong.
In these 2 files (/etc/synoinfo.conf and /etc.defaults/synoinfo.conf), find these values and modify them with the hex values you get before:
Check if everything works
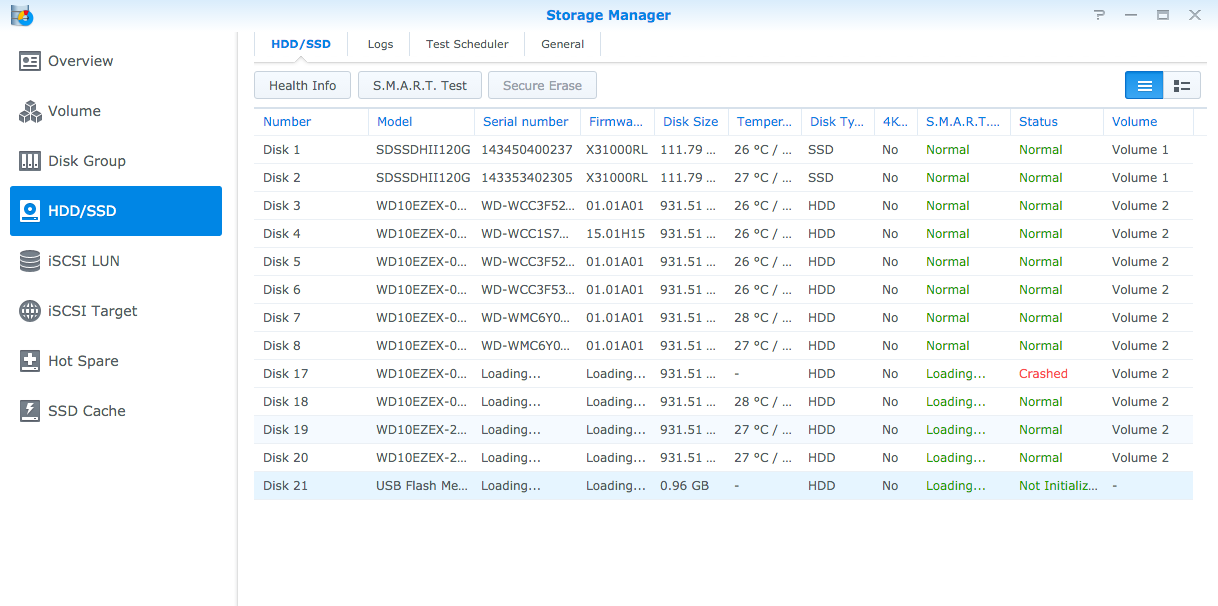
No need to reboot your NAS. In DSM go to Storage Manager > HDD/SSD and you should be able to see all your hard drives now. For me, 10 HDD. In the capture below, I have one drive that crashed, but it is not related to this post. There is also 2 SSD and one usb key. The four HDD that where missing are marked as “Loading”, because I am extending the volume “volume2” with the 4 previously missing HDD.