How to setup wildcard dev domains with dnsmasq on a mac
I am developping a website for which each user has its own subdomain: user1.example.localhost, user2.example.localhost, etc…
On my mac, I am using the .localhost extension to serve development websites. I am able to access the base domain name of the app (example.localhost), but subdomains are not resolved on my local environment.
Modifying /etc/host is not an option, because it does not allow wildcard domains (*.example.localhost), and I do not know the subdomains in advance because they depend on the user name that is randomly generated by a database seeding library.
Dnsmasq provides a local DNS server that will do the job.
Install dnsmasq on macOS with homebrew:
~ brew install dnsmasq
Find dnsmasq configuration file
~ brew info dnsmasq

dnsmasq: stable 2.79 (bottled)
Lightweight DNS forwarder and DHCP server
http://www.thekelleys.org.uk/dnsmasq/doc.html
/usr/local/Cellar/dnsmasq/2.78 (8 files, 512.8KB)
Poured from bottle on 2017-10-03 at 14:55:21
/usr/local/Cellar/dnsmasq/2.79 (8 files, 516.3KB) *
Poured from bottle on 2018-03-19 at 08:20:32
From: https://github.com/Homebrew/homebrew-core/blob/master/Formula/dnsmasq.rb
==> Dependencies
Build: pkg-config ✘
Optional: libidn ✘
==> Options
--with-dnssec
Compile with DNSSEC support
--with-libidn
Compile with IDN support
==> Caveats
To configure dnsmasq, take the default example configuration at
/usr/local/etc/dnsmasq.conf and edit to taste.

To have launchd start dnsmasq now and restart at startup:
sudo brew services start dnsmasq
Edit dnsmasq configuration, and add a line at the end of the file
~ vim /usr/local/etc/dnsmasq.conf

# This file will be added to the configuration
conf-file=/Users/your_user_name/.dnsmasq/dnsmasq.conf
Create a new configuration file
We create a new configuration file to manage example.localhost and *.example.localhost domains.
~ vim /Users/your_user_name/.dnsmasq/dnsmasq.conf

# example.localhost will be resolved as 127.0.0.1, including subdomains
address=/example.localhost/127.0.0.1
listen-address=127.0.0.1
Restart dnsmasq
~ sudo brew services stop dnsmasq

~ sudo brew services start dnsmasq
Modify macOS network configuration
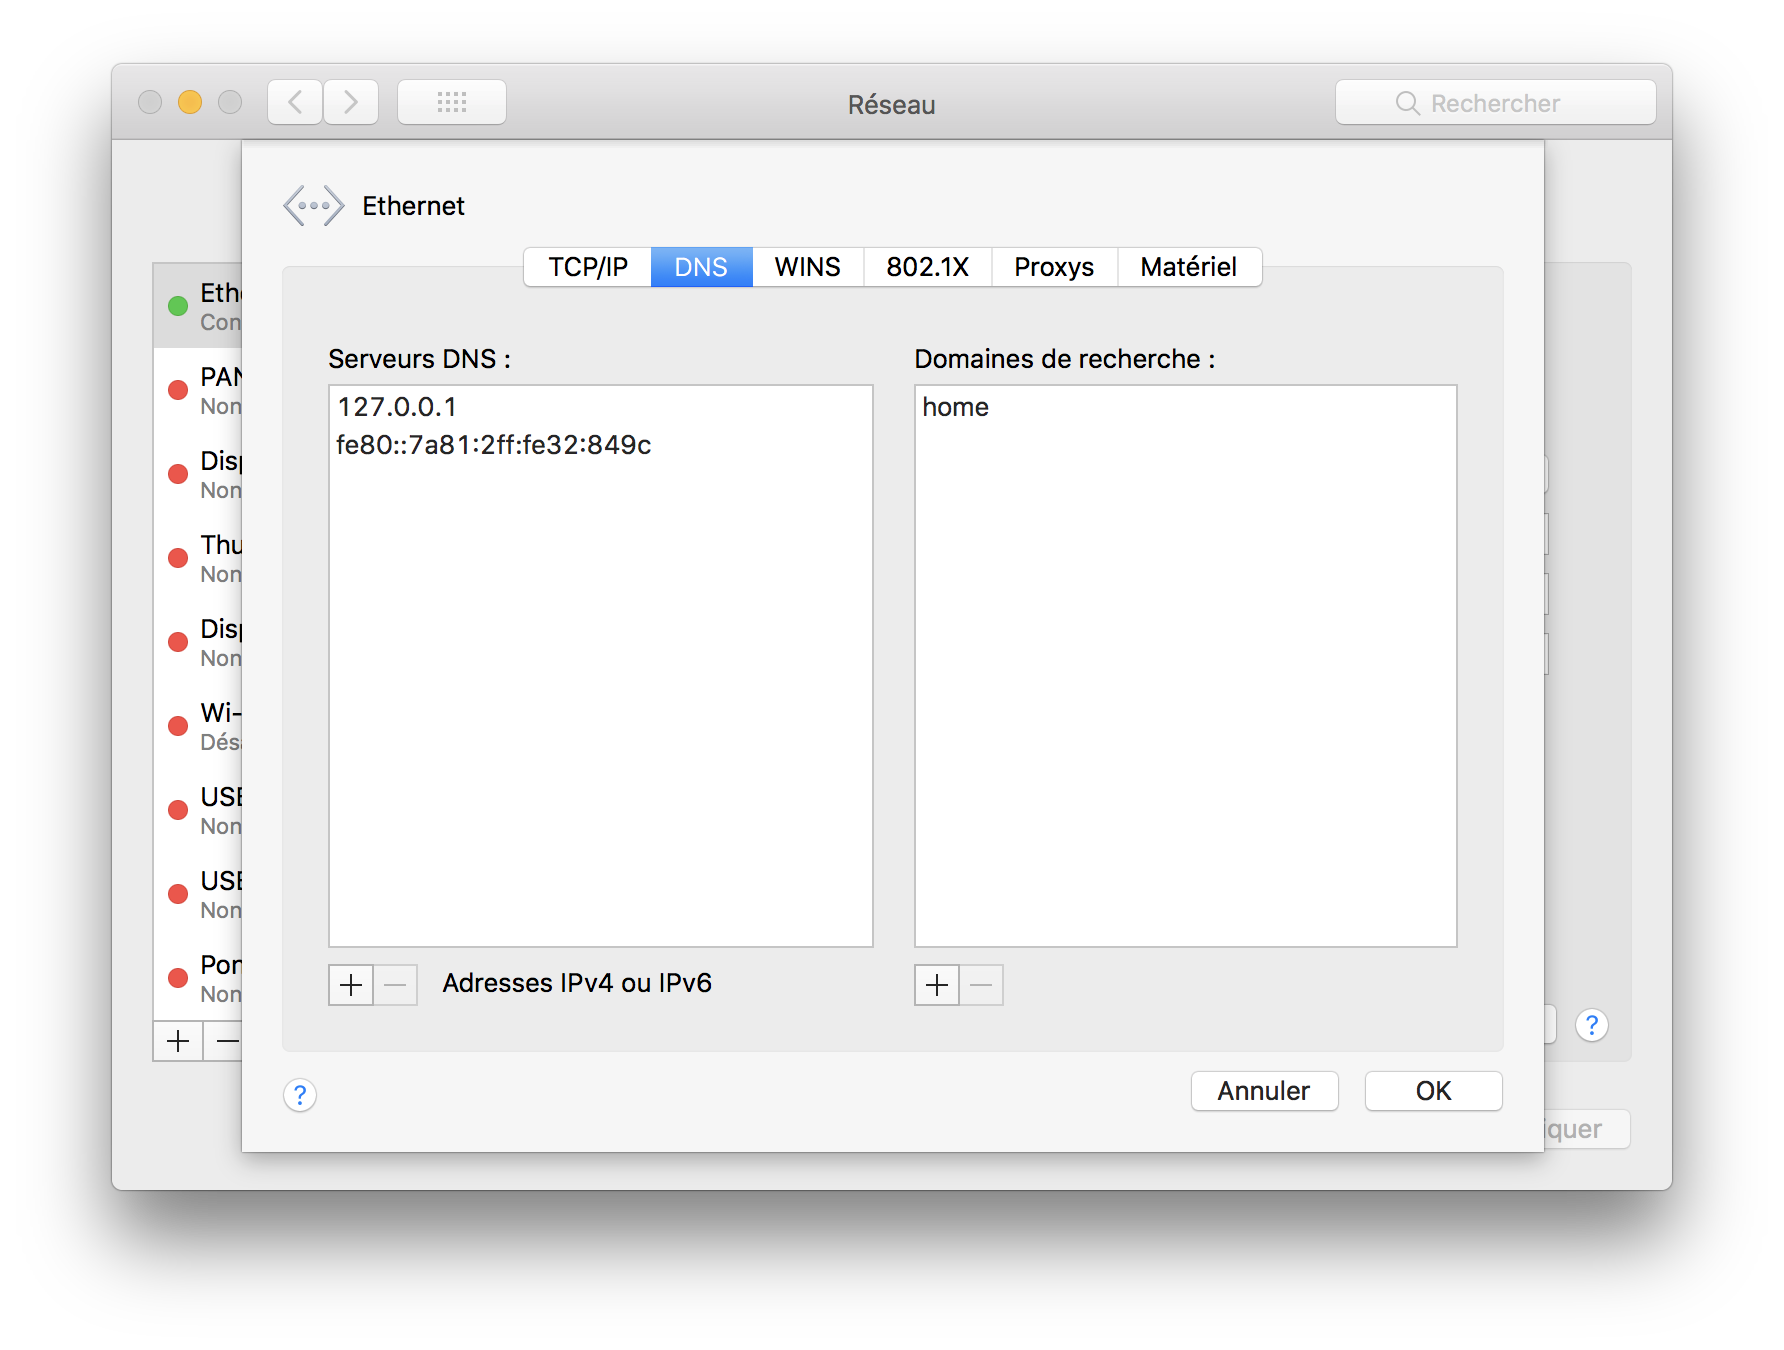
We need to tell macOS to use 127.0.0.1 as the first DNS resolver.

Done
You can now access your dev websites in your browser using example.localhost, foo.example.localhost, bar.example.localhost, etc…